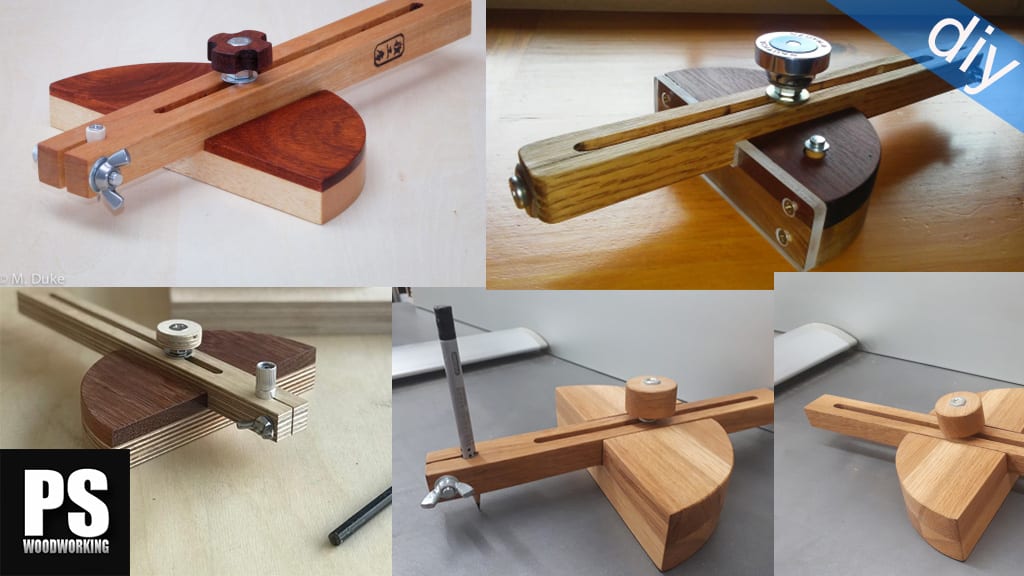
This is my new project, a 2-in-1 marking gauge and beam compass, ideal for DIY and woodworking projects. It is an innovative, easy to make design, combining the best of both tools into one package.

This is how the SketchUp file looks like. You can download the plans for free in my web, here you´ll find them.
Free Plans
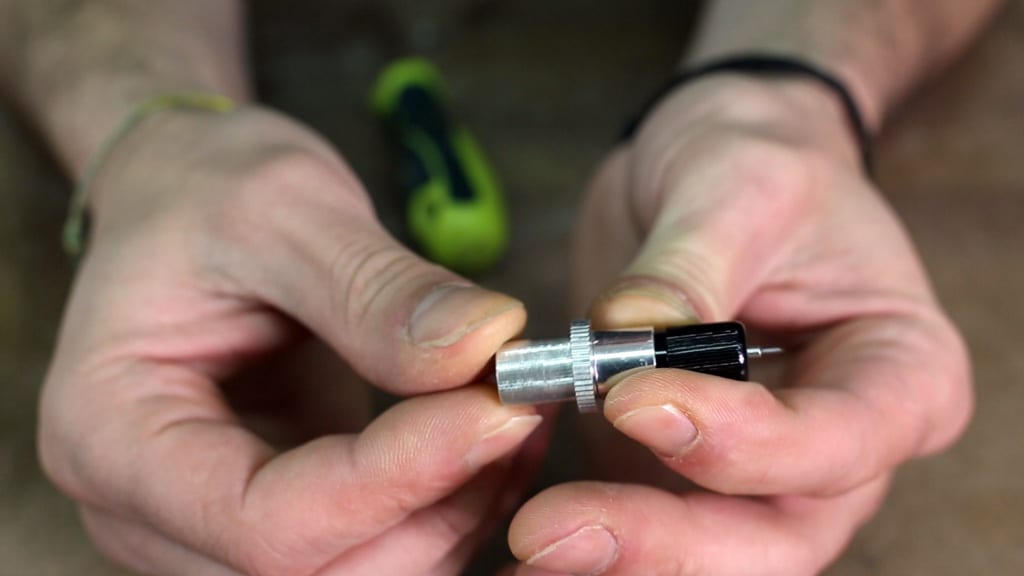
To build it I am gonna use a plotter blade holder that as you can see it has a little magnet inside that holds the blade, a bearing so it can turn and this little bolt so we can adjust the hardness of the spring.
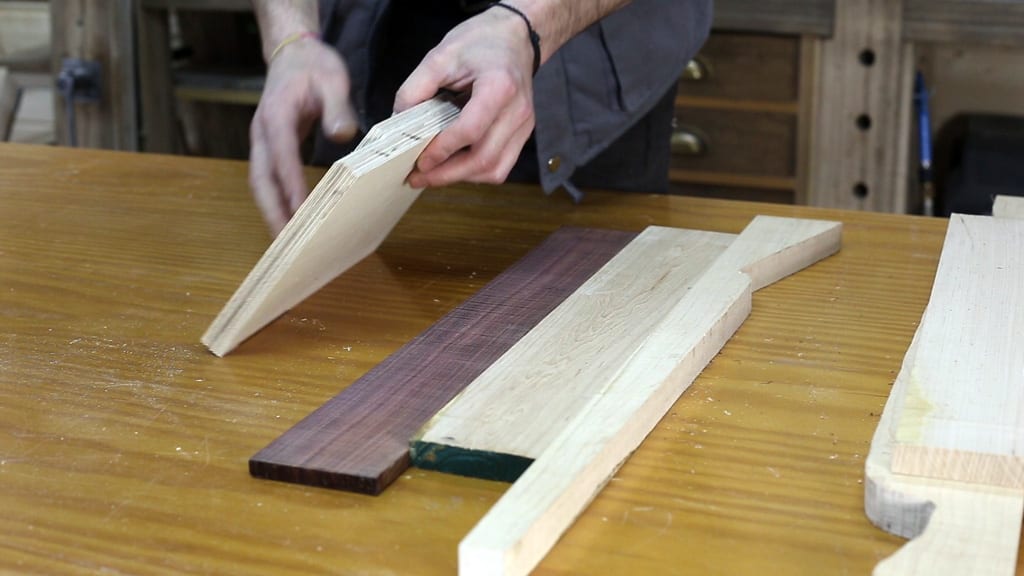
I am also going to use scrap wood from guitar making like curly maple and rosewood. Although, the plans are designed to build it with plywood too. Cut all the pieces following the plans.
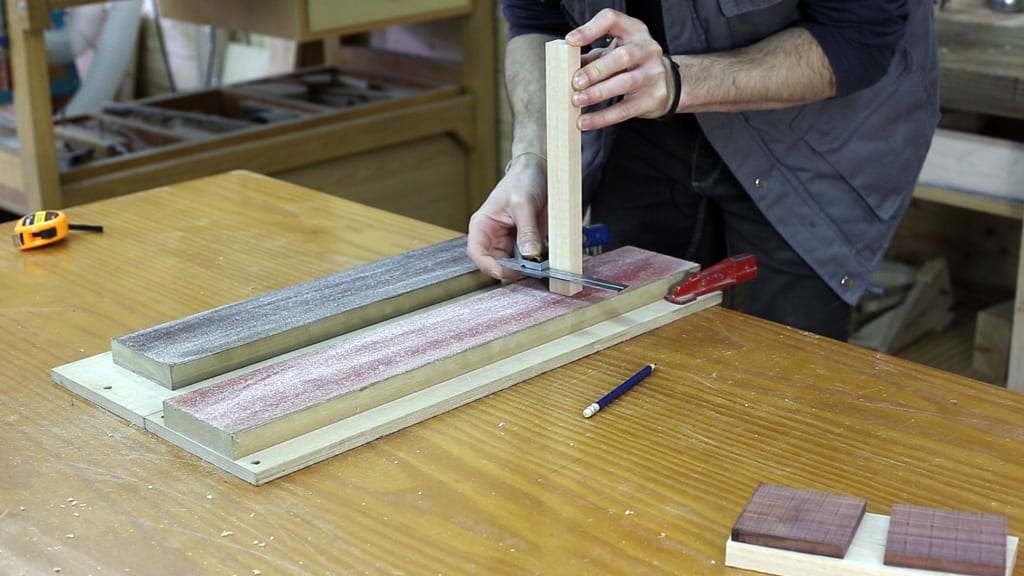
Sand all the parts checking the squareness. Glue the rosewood parts to make the guide. To avoid it from moving, insert a couple of screws first.
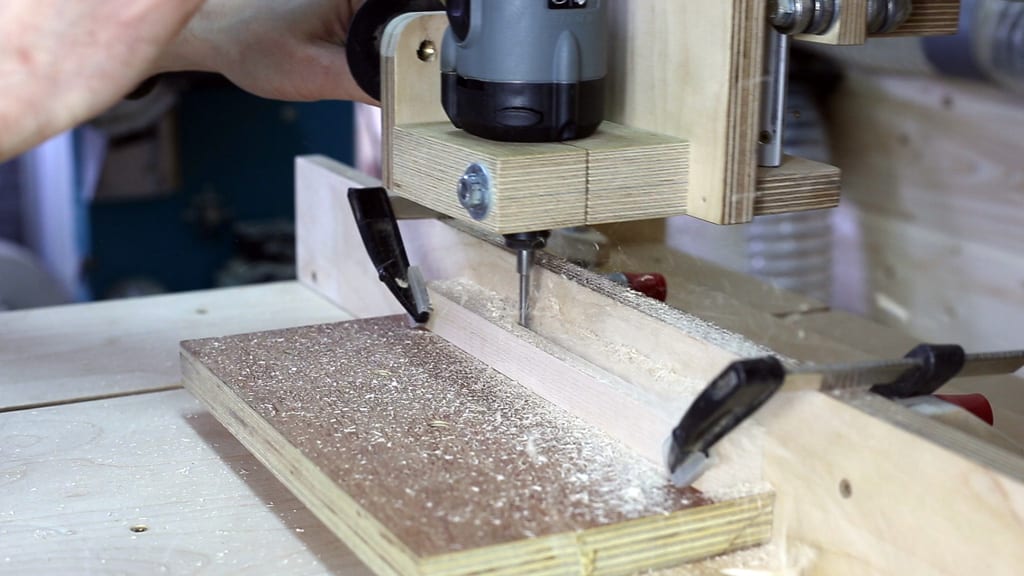
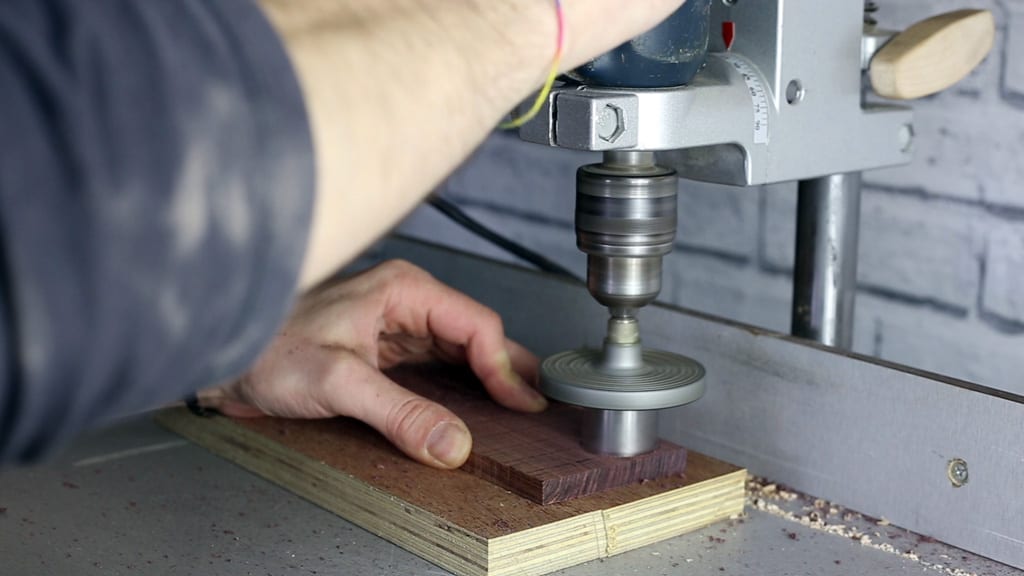
Mechanize the adjust channel in the 3D Router and the location of the plotter blade.

Give its shape to the base and improve the surface finish using the band saw. Next, make the drill hole for the threaded insert.
And now, mechanize the knob.

I am gonna sharp a bolt on my belt sander table so I can use it as rotation axis.

This is my new toy, a branding Iron for wood.

Sand and varnish it with spray lacquer.

And it is ready, so I am gonna try first the Marking Gauge.
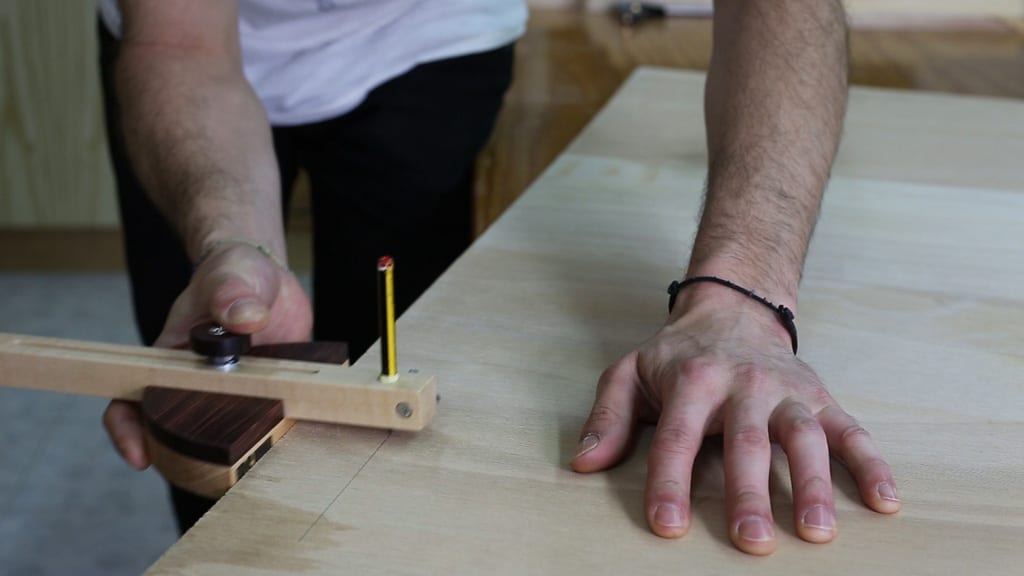
You can also use a pencil instead of the blade.

And now I’ll try the Beam Compass with a marker.

Of course, you can also use the blade here.


A plotter blade holder… something we all have just laying around 😀
😀 😀
I’m loving your videos!The threaded insert that you used. What’s the proper name for it and where might I find them? Please keep these videos coming! I will have to make a couple of these I think!
hi, check this out:
muito bom